Celebrate Easter with a delicious twist that everyone can enjoy. If you’re vegan and looking to try something new this Easter, this chocolate cake promises to be a delightful centerpiece that will make your holiday celebration even more special.
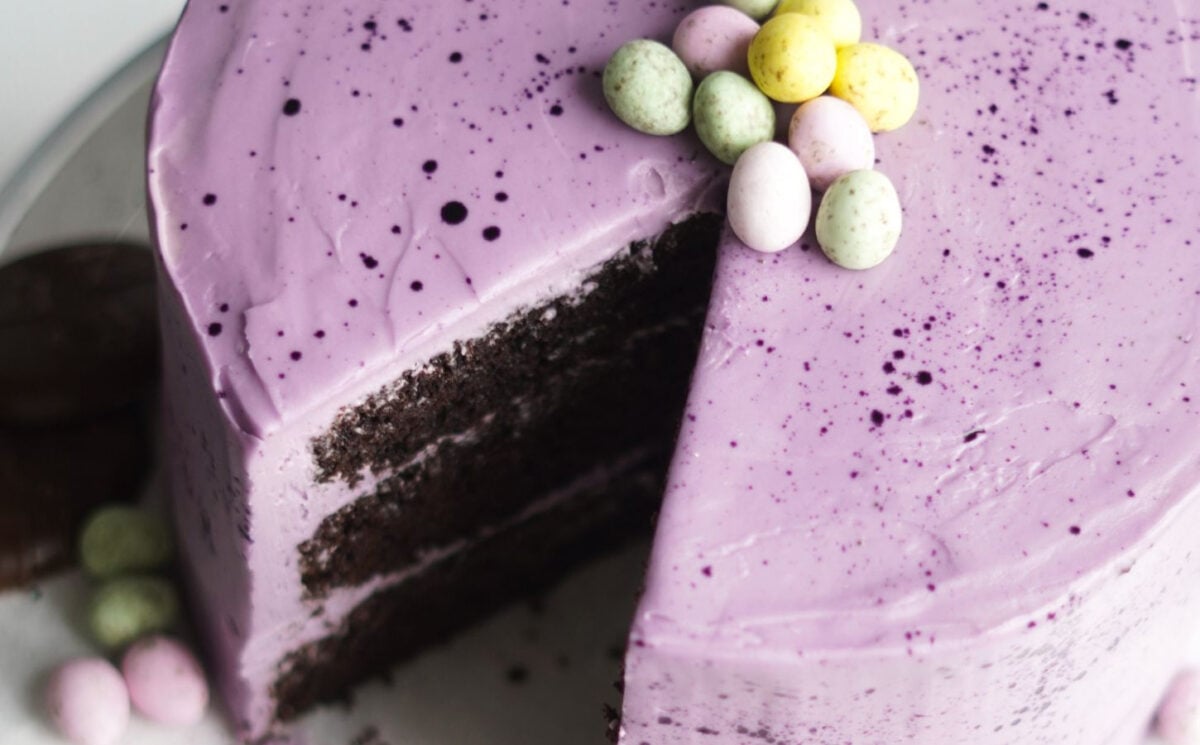
Stine Andersen’s Vegan Easter Chocolate Cake is a moist chocolate cake with layers of smooth purple-colored vanilla frosting, decorated with delicious vegan chocolate Mini Eggs. What makes it an excellent choice for Easter dessert is not only its delightful taste and appearance but also how easy it is to make.
Made with the finest plant-based ingredients, this cake is a wonderful combination of indulgence and compassion. Completely vegan, this cake offers a guilt-free pleasure to all your guests, ensuring that everyone can indulge in the sweetness of Easter.
How to store this vegan chocolate cake
Ensuring your vegan Easter chocolate cake remains fresh and delectable involves a few simple storage steps:
- Cool the cake completely: Let your cake cool completely at room temperature before storing it.
- Use an airtight container: After letting the cake cool completely, it should be stored in an airtight container or tightly wrap the cake in aluminum foil or plastic wrap to prevent drying out.
- Refrigerating the cake: Refrigerating the cake can keep it fresh for up to 4–5 days and maintain the texture and flavor. Your cake will keep its moisture for longer if it’s stored at room temperature, but then it won’t last as long.
- Put the cake in the freezer: Freezing offers a longer-term solution for 2–3 months, with the cake needing to be thawed in the refrigerator before enjoyment. Make sure to put the cake in a container before freezing to avoid contamination.
By following these storage tips, you can extend the enjoyment of your vegan Easter chocolate cake, making it a lasting part of your holiday celebration.
Vegan Easter chocolate cake recipe
Ingredients
Cake
- 400 ml oat milk
- 1 tsp apple cider vinegar
- 250 grams sugar You can use white or light brown sugar for this cake.
- 150 ml neutral oil Always use neutral oil when baking desserts.
- 220 grams plain flour Use plain flour for best results.
- 80 grams cocoa powder
- 1 tsp baking powder Make sure your baking powder/soda isn't old; if it's old, it will not make the cake rise.
- 1 tsp baking soda
- Pinch of salt
Frosting
- 2-3 tubs of store bought vegan vanilla frosting Optionally: use Betty Crocker frosting or make your own
- Purple food coloring As much as you'd like
Topping
- 1 bag vegan Mini Eggs
Instructions
- Begin by preheating your oven to 180°C.
- Prepare your 2 (9 inch) baking tins by lining them with parchment paper and giving them a light coating of oil or plant butter for a non-stick surface.
- In a mixing bowl, combine the oat milk, apple cider vinegar, oil, and sugar. Set this mixture aside for later use.
- In a larger bowl, sift together the flour, cocoa powder, baking powder, baking soda, and a pinch of salt.
- Transfer your batter into the prepared tins and bake for approximately 25 minutes. Avoid opening the oven door unless you detect a burnt smell. Check the cake 10 minutes before the timer goes off using a toothpick. If there's still batter on the toothpick, continue baking.
- Once baked, allow the cakes to cool, wrap them in cling film, and refrigerate for at least 3 hours. An overnight chill is recommended for complete setting and cooling.
- Prepare your frosting and add food coloring in a mixing bowl until achieving a smooth consistency, add a tbsp of oat milk to make it more silky. Transfer it to a piping bag and pipe a circle around the cake's edge. Fill the middle with frosting, ensuring it's evenly distributed, then smooth it out.
- Place the second cake layer on top and use the piping bag to add a thin layer of frosting (known as a crumb coat). Refrigerate again.
- Next, begin frosting the sides and top of the cake generously, ensuring a well-coated appearance. Use a spatula (or cake palette knife) for a smooth finish.
- If the cake becomes crumbly, add it to the freezer or fridge, it will help it set.
- Finally, unleash your creativity in decorating the cake as you desire, and enjoy a slice with your loved ones.
This recipe was republished with permission from Stine Andersen at Give Me Plant Food. You can view the original recipe here.
More like this:

