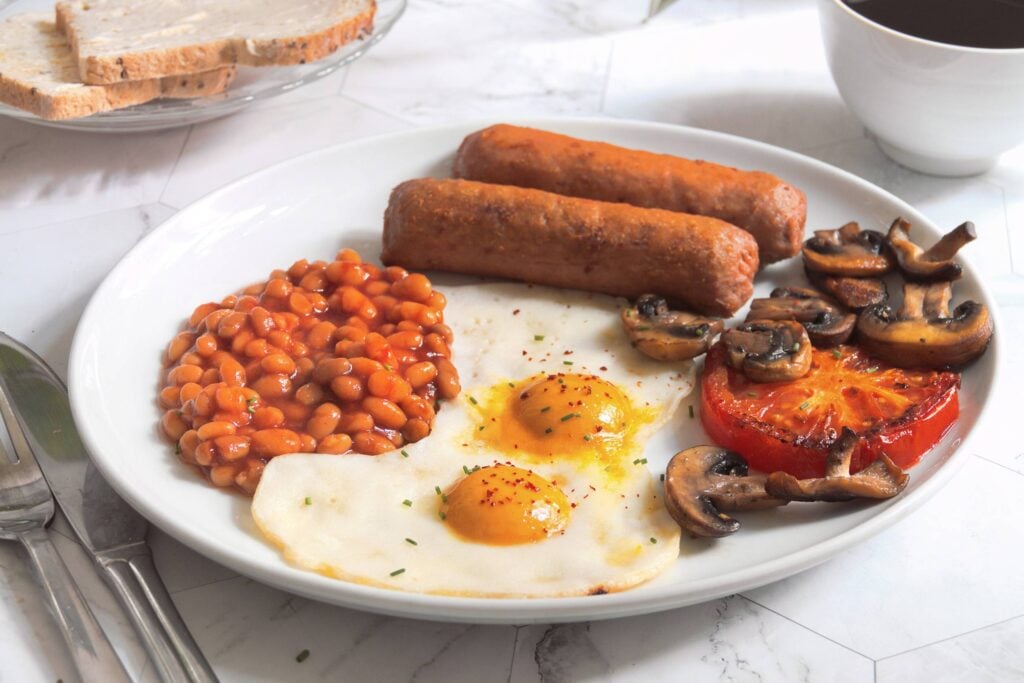
Ingredients
Vegan Yolk
- 3 tbsp aquafaba (liquid from can of chickpeas)
- 1 tbsp chickpeas
- 1/2 cup groundnut oil (peanut oil, or another neutral tasting oil)
- 3 tsp tapioca starch
- 1 tsp english mustard or Dijon (smooth)
- 2 tbsp ketchup
- 1/4 tsp turmeric
- 1/4 tsp paprika
- 1/4 tsp kala namak
- 1 tsp shiro miso (light)
- + veg or olive oil for greasing only see recipe
Vegan Egg White
- ? cup soy cream such as Alpro (not the light version)
- 2 tsp neutral tasting veg oil, such as groundnut oil
- ¼ cup water cold or room temperature
- ¼ cup + 2 tsp corn starch AKA corn flour in the UK
- 2 tsp tapioca starch AKA tapioca flour
- + veg or olive oil for frying only see recipe
Instructions
- The process is simple enough: mix ingredients for yolk; steam the mixture briefly in the mould; whisk ingredients for white; fry the white and add the yolk. However, I’ve described it in great detail to avoid confusion or disappointment!
- Prep time 20-30 mins, cooking time 2-5 mins. Makes enough for six vegan fried eggs, with yolk sauce left over for dipping or more vegan fried eggs.
- All measurements are level, using standardised measuring spoons and cups. Be precise!
- Prepare the yolks:
- 1. Grease a flat, smooth plate with vegetable or olive oil (approx. 1 tablespoon). This is where you will carefully deposit the prepared yolks so that they don’t break. Set aside.
- 2. Make a batch of vegan yolk sauce following this quick and simple recipe.
- 3. In a mixing bowl, whisk together 4 level tablespoons of the sauce with 3 level teaspoons of tapioca flour until no lumps remain.
Fill 6 holes in your mould almost all the way to the top using 2 teaspoons of mixture per yolk. Place the mould into your steamer insert and set aside for now. We have to get the pot fully steaming before adding the insert. - 4. Add approx. two cups of water to the pot you’ll use for steaming. Bring the water to the boil.
Once the steam is billowing at full strength, add your steamer insert and place the lid on top. Wait exactly 1½ minutes before removing the steamer tray from the heat. Remove the lid and allow the steam to disperse fully. - Please be careful not to burn yourself
- 5. When the mould is cool enough to touch, lay your greased plate upside-down over the mould and gently flip the plate back over, supporting the entire mould with your hand (but not squishing it).
- If all has gone well, the yolks will have popped out on their own. Otherwise, gently flex the mould from one side to the other to release the fragile yolks.
- The whites:
- 6. In a separate mixing bowl, whisk together the egg white ingredients until no lumps remain.
- Swirl the mixture around in the bowl to remove any small foamy bubbles. (If you let the mixture sit a while, the bubbles will disperse completely, but this isn’t a must.)
- 7. Pre-heat your non-stick frying pan to a medium-high heat and then add 2 tbsp of white mixture per egg. Don’t add any oil to the pan until the egg has started to cloud over and firm up around the edges. Then you can add a glug of oil to the pan and move the egg around so that the oil can get under it and crisp it up.
Starting to see some colour underneath? Using a spatula, carefully scoop up a yolk and deposit it in the middle of your white. Bear in mind that the yolk will get less runny the longer it’s heated.
When the white is golden brown underneath it’s ready to serve. Season with a pinch of salt, pepper and optionally some chili flakes or fresh herbs.
Prepare the yolks:1. Grease a flat, smooth plate with vegetable or olive oil (approx. 1 tablespoon). This is where you will carefully deposit the prepared yolks so that they don’t break. Set aside.2. Make a batch of vegan yolk sauce following this quick and simple recipe. 3. In a mixing bowl, whisk together 4 level tablespoons of the sauce with 3 level teaspoons of tapioca flour until no lumps remain. Fill 6 holes in your mould almost all the way to the top using 2 teaspoons of mixture per yolk. Place the mould into your steamer insert and set aside for now. We have to get the pot fully steaming before adding the insert.4. Add approx. two cups of water to the pot you’ll use for steaming. Bring the water to the boil. Once the steam is billowing at full strength, add your steamer insert and place the lid on top. Wait exactly 1½ minutes before removing the steamer tray from the heat. Remove the lid and allow the steam to disperse fully. Please be careful not to burn yourself 5. When the mould is cool enough to touch, lay your greased plate upside-down over the mould and gently flip the plate back over, supporting the entire mould with your hand (but not squishing it). If all has gone well, the yolks will have popped out on their own. Otherwise, gently flex the mould from one side to the other to release the fragile yolks.The whites:6. In a separate mixing bowl, whisk together the egg white ingredients until no lumps remain. Swirl the mixture around in the bowl to remove any small foamy bubbles. (If you let the mixture sit a while, the bubbles will disperse completely, but this isn’t a must.)7. Pre-heat your non-stick frying pan to a medium-high heat and then add 2 tbsp of white mixture per egg. Don’t add any oil to the pan until the egg has started to cloud over and firm up around the edges. Then you can add a glug of oil to the pan and move the egg around so that the oil can get under it and crisp it up. Starting to see some colour underneath? Using a spatula, carefully scoop up a yolk and deposit it in the middle of your white. Bear in mind that the yolk will get less runny the longer it’s heated. When the white is golden brown underneath it’s ready to serve. Season with a pinch of salt, pepper and optionally some chili flakes or fresh herbs.


