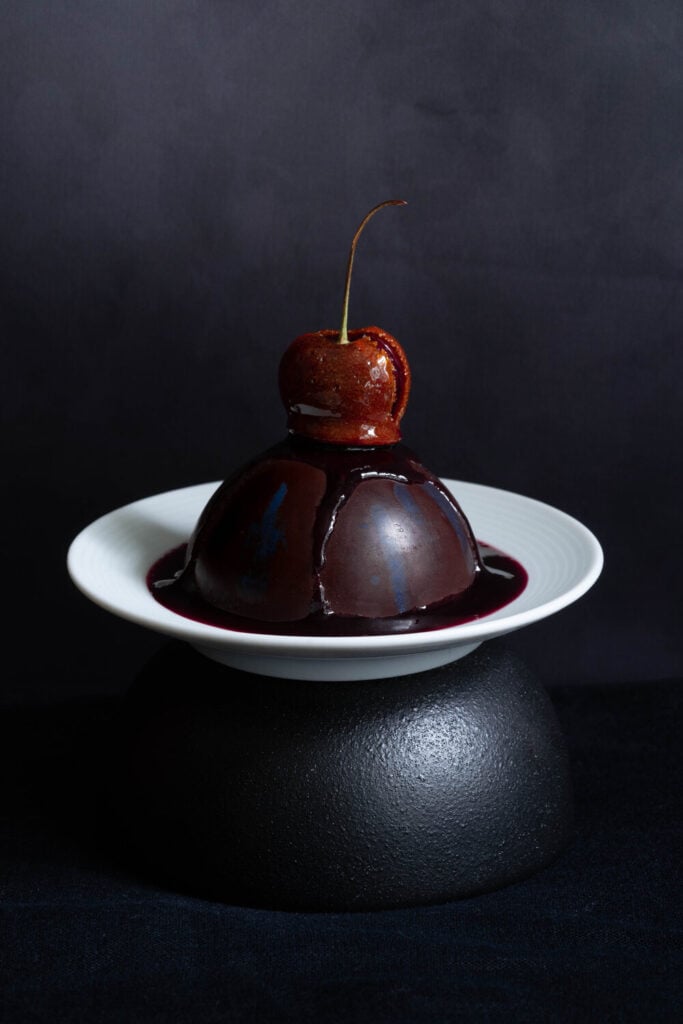
Here’s a showstopper for you! Imagine making this for a dinner party… your guests would think you bought it from the store, it’s that good!
Ingredients
SHELL
- 10 g cacao butter plus colour I used a pinch of Spira natural blue dye (optional)
- 200 g dark cooking chocolate
SAUCE
- 200 g cherries
- 50 g sugar I used golden caster sugar
- 200 ml strong coffee
CHERRIES
- 6 fresh cherries
- 6 hazelnuts t and g
- 100 g sugar
FLUFF
- 75 ml 5T aquafaba
- Few drops almond essence
- 1/4 t vanilla paste
- 1/2 t cream of tartar or arrowroot
- 90 g caster sugar
Instructions
- Start by making the chocolate domes. The process is exactly the same as making Easter eggs by building up thin layers of chocolate in the moulds. But first we add the colourful drips to the mould by melting the cacao butter, adding the food colouring, then dripping it into the moulds and allowing it to set. This step is optional. Now melt one third of the chocolate in a jug in a saucepan of boiling water. Pour the chocolate into the moulds then tilt and turn the mould so the chocolate covers all of the mould. To ensure the edges are not too thin and easily break spoon chocolate onto the inside rim of the mould. Allow the chocolate to set at room temperature.
- Once the chocolate has set, melt another one third of the chocolate, add to the mould and allow it to set. Repeat this with the remaining chocolate. This part of the recipe should not be rushed so you are allowing the chocolate to set completely each time. This will result in a more stable shell that won’t crack when you remove it from the mould.
- To make the sauce, blend the cherries with the sugar and coffee. Pour this into a saucepan on a high heat. Allow the mixture to bubble until it has reduced by half and is thick. Pour the sauce through a fine sieve into a bowl and set to one side.
- To make the toffee cherries start by heating your oven to 150c. Put the hazelnuts on a baking tray and bake for around 15 minutes until the skins are dark brown and can be rubbed off. Allow the nuts to cool then put them between your flat palms and rub your hands together to remove the skins.
- Select 6 cherries that have nice stalks. Using a sharp vegetable knife slice the cherry in half but do not cut through the very top, so that the cherry opens like a shell and the stalk is still attached. Use the tip of the knife to cut around the stone and remove it. Replace the stone with a hazelnut and close the cherry. If the hazelnut is a bit too big you can squash the cherry so the sides come together.
- To make the toffee for the cherries, put the sugar into a saucepan on a medium to high heat. Allow the sugar to melt, turn completely golden and to start to thicken. For it to set to toffee, rather than be runny, we need it to be hot enough. We can tell if it is hot enough a few different ways. I use the change in colour to tell me when it is done. It should darken so it is a shade darker than when it first melted. Any darker than this and it can easily burn which will give it a nasty flavour. You can also tell the thickness by putting a small amount of the syrup in a small bowl and putting it into the fridge. Once it cools a little you can see if it is thick enough.
- Dip each cherry into the syrup holding it by the stalk. Be careful not to get any onto your skin as it is incredibly hot. After you have dipped a cherry, put it onto the baking paper. They should set immediately if the toffee was cooked enough. If you need to store the cherries, put them into an airtight container somewhere cool and dark but not in the fridge.
- To make the fluff that will go inside the domes, put the aquafaba in a large bowl. Use a high sided bowl to minimise splatter. Add the almond essence, vanilla paste and cream of tartar. Whisk on the lowest setting until the mixture starts to fluff up. Pause the whisk and add a small amount of sugar. Progressively move up through the settings, going up a speed as the mixture gets fluffier. Occasionally pause the whisk to add more sugar until all the sugar is added. If the aquafaba looks quite slack and liquidy, stay on a low setting until it gets fluffier and then go on to the higher settings. Whisk the mixture to the stiff peak stage, this is where you can remove the whisk and the peak that is formed will stay in a stiff peak. For this recipe we need the fluff to be very firm.
- Now you have created all the composite parts, you are ready to assemble the desserts. Spoon the sauce onto your serving plates. Take a dome, turn it upside down and fill it with fluff. Put the domes onto the plates, on top of the sauce. Spoon more sauce in the dome, add a cherry to each dessert. Serve the desserts with a fork and a spoon as a fork is needed to crack the chocolate dome.
This recipe was republished with permission from Chef Day Radley.
Find the original recipe here.