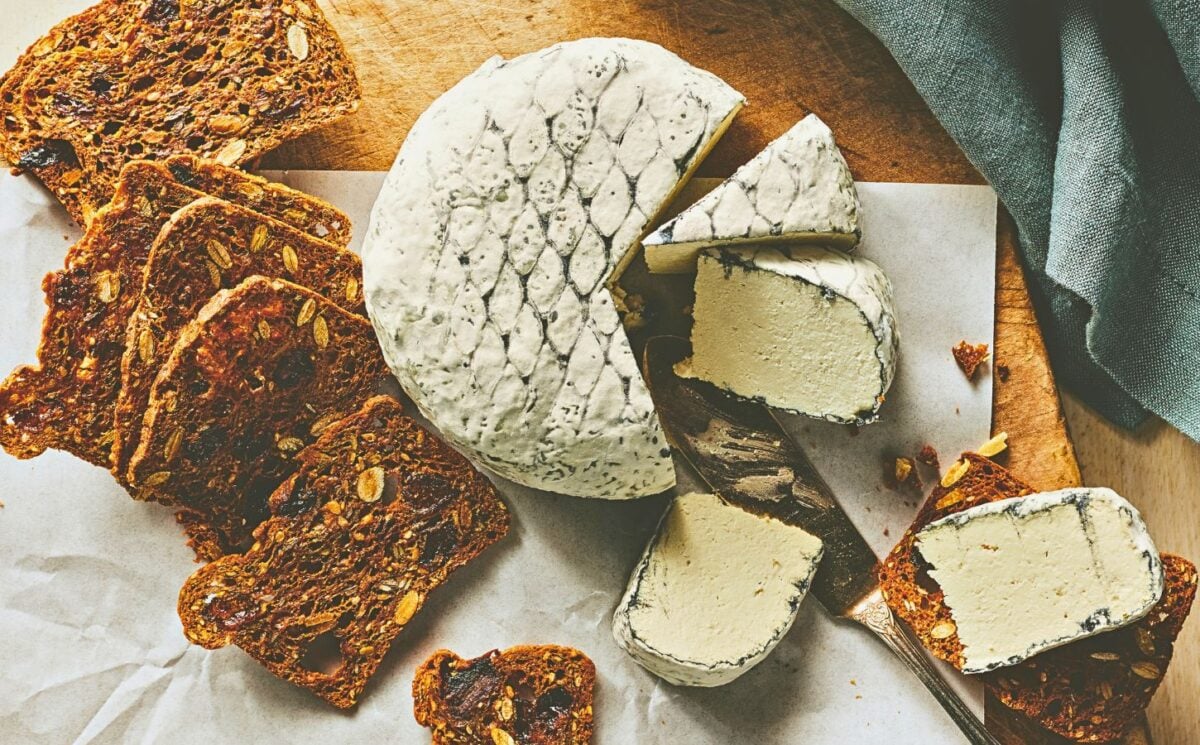
A soft, plant-based cheese with a delicate white rind that melts into a creamy center as it ages. Just like brie or camembert, but completely dairy-free.
Ingredients
- 1 cup (140g) almonds (if not using a high-powered blender, soak in water for 8 hours, then drain and rinse)
- ½ cup (70g) pumpkin seeds
- ½ cup (70g) hemp hearts
- 3 cups (710ml) water
- 1½ teaspoons calcium sulfate dissolved in 1 tablespoon water
- 1 teaspoon fine sea salt
- ⅛ teaspoon vegan mesophilic culture
- ⅛ teaspoon MinusMilk vegan version of Flora Danica
- A small pinch 1/32 teaspoon
- Penicillium candidum
- A very small pinch 1/64 teaspoon Geotrichum candidum (optional)
- Mold Spray recipe follows, optional but encouraged
Instructions
- In a blender, combine the almonds, pumpkin seeds, hemp hearts, and water and blend until smooth and milky, 1 to 2 minutes. Pour this mixture through a nut milk bag and squeeze to extract as much milk out as possible into a saucepan.
- Set the saucepan over medium-low heat and bring to a simmer, scraping the sides and bottom occasionally. When the milk has begun to form very light curds and reached a temperature of over 185°F, add the dissolved calcium sulfate and mix into the milk; continue to cook for 15 seconds. Put the pan in the refrigerator and let it cool and coagulate until it has cooled to below 90°F, 1 to 2 hours.
- Stir in ½ teaspoon of the salt, the culture, MinusMilk, the Penicillium candidum, and Geotrichum candidum (if using). If you have a cheese mold designed for draining with lots of holes, you can sterilize it and place it over a jar or other container so that the whey can drain below.
- Otherwise, using a rubber band, attach a large, sterilized piece of cheesecloth over a wide-mouth jar or deep dish. Pour the cheese into the cheesecloth so that the whey can drain below. Put the jar in a warm place where it can maintain a temperature of around 85°F for 16 to 20 hours, until a pH of 4.5 to 4.6 is reached.
- Before ripening the cheese and letting the mold grow, first check that the cheese is adequately firm. It should feel springy to the touch. If it is still wet, take the cheese out of the mold, wrap it in a few layers of cheesecloth or paper towels, and put it in the refrigerator for 8 to 24 hours, changing the towels as they get wet.
- Get your ripening box ready. A Japanese bamboo sushi mat is good for bloomy rinds, and if made properly, the mold will inhabit the bamboo and make future batches easier to make. You can also use a cheese mat. Place the mat in the ripening box.
- If the cheese was drained in a cheese mold, unmold the cheese, sprinkle with the remaining ½ teaspoon salt, and place on the sushi mat. If it was drained in hanging cheesecloth, line a mold with plastic wrap, pack the cheese in it, and press to form a wheel. Unmold the cheese, sprinkle with the remaining ½ teaspoon salt, and place on the mat in the box.
- Spray the cheese lightly with mold spray. Although spraying is optional, I find it encourages mold growth. Cover the box with cheesecloth (not the lid) and keep at room temperature for 24 to 36 hours; this will allow the cheese to continue drying and help prevent a wet surface.
- Carefully flip the cheese and spray. This time, cover the ripening box with a lid and keep at room temperature for another 2 to 3 days, flipping and spraying lightly daily, until you see mold growth. The humidity in the box should be around 91%; if you begin to see beads of water accumulate in the box or the surface of the cheese, blot with a clean paper towel; you may need to remove the lid and re-cover with cheesecloth to allow the cheese to dry out a bit more. Once the mold starts to take root, you can flip every 2 days. In winter, I can generally keep the cheese in a cool spot inside until the entire surface is covered in mold (7 to 10 days). In the summer, I will only keep at room temperature for 2 to 4 days until I see mold growth, then will move it to a wine fridge. Note that the cooler the temperature, the slower the mold growth will be.
- Once the mold has covered most of the surface of the cheese, you can move the cheese to your refrigerator. If the mold starts to look fuzzy, just pat it down. After the mold has covered the cheese entirely, you can wrap the cheese if you want (although it’s not necessary) or just keep it in the container. If you choose to wrap it, use a cheese paper designed for bloomy rind cheeses or parchment paper, as the mold needs oxygen to survive.
- Store in the refrigerator for 6 to 8 weeks. It will get stronger in flavor as it ripens and ages.
Mold Spray
Bring ½ cup (120ml) water to a boil, then let it cool to room temperature. Pour into a small glass spray bottle and add ¼ teaspoon Penicillium candidum, a pinch of salt, and a pinch of Geotrichum candidum.
White Ash Rind
Coating the surface of Snow White Rind (page 150) in activated charcoal helps to alkalize the surface, encouraging mold growth, and it looks beautiful as well. After salting your wheel, sprinkle some activated charcoal on the surface of the cheese and follow the directions above for ripening.
White Mountain Goat
This is a “goat” cheese covered in Penicillium candidum, reminding me of the white goats I saw on the snowy steppes of Mt. Etna.